Installing the Webaaty WordPress plugin, step by step
The full walkthrough of the Webaaty plugin — install, scan, preview, go live, and what every screen does once you're connected.
Webaaty is Chaaty's WordPress plugin. It builds an AI assistant from your website, previews it before anything goes live, and then lets you manage the assistant — stats, settings, plan — without leaving WordPress. This is the complete tour.
Install and activate
Go to Plugins → Add New Plugin, search Webaaty, click Install Now, then Activate.
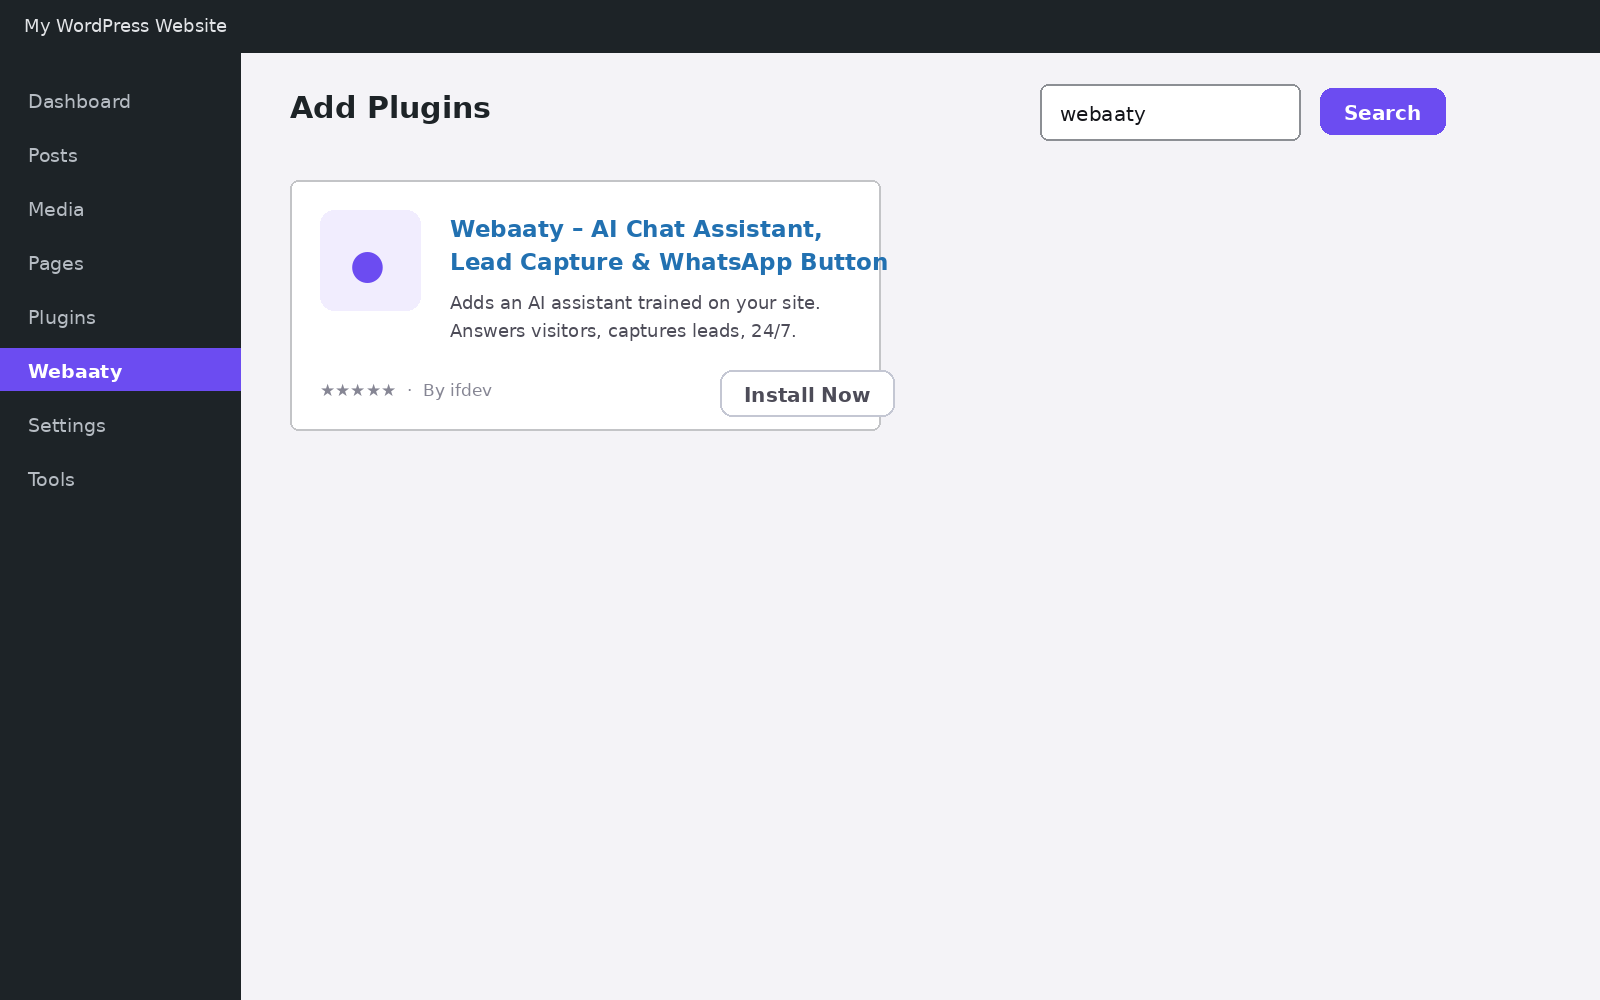
Webaaty gets its own item in the sidebar — it doesn't hide under Settings.
Short on time? Create your free assistant and it does the setup below for you — no card needed.
Scan your website
Open Webaaty. Your site's URL is pre-filled; click Scan my website. The scan reads your public pages and builds a working assistant from them — services, tone, opening greeting. Under a minute for most sites.
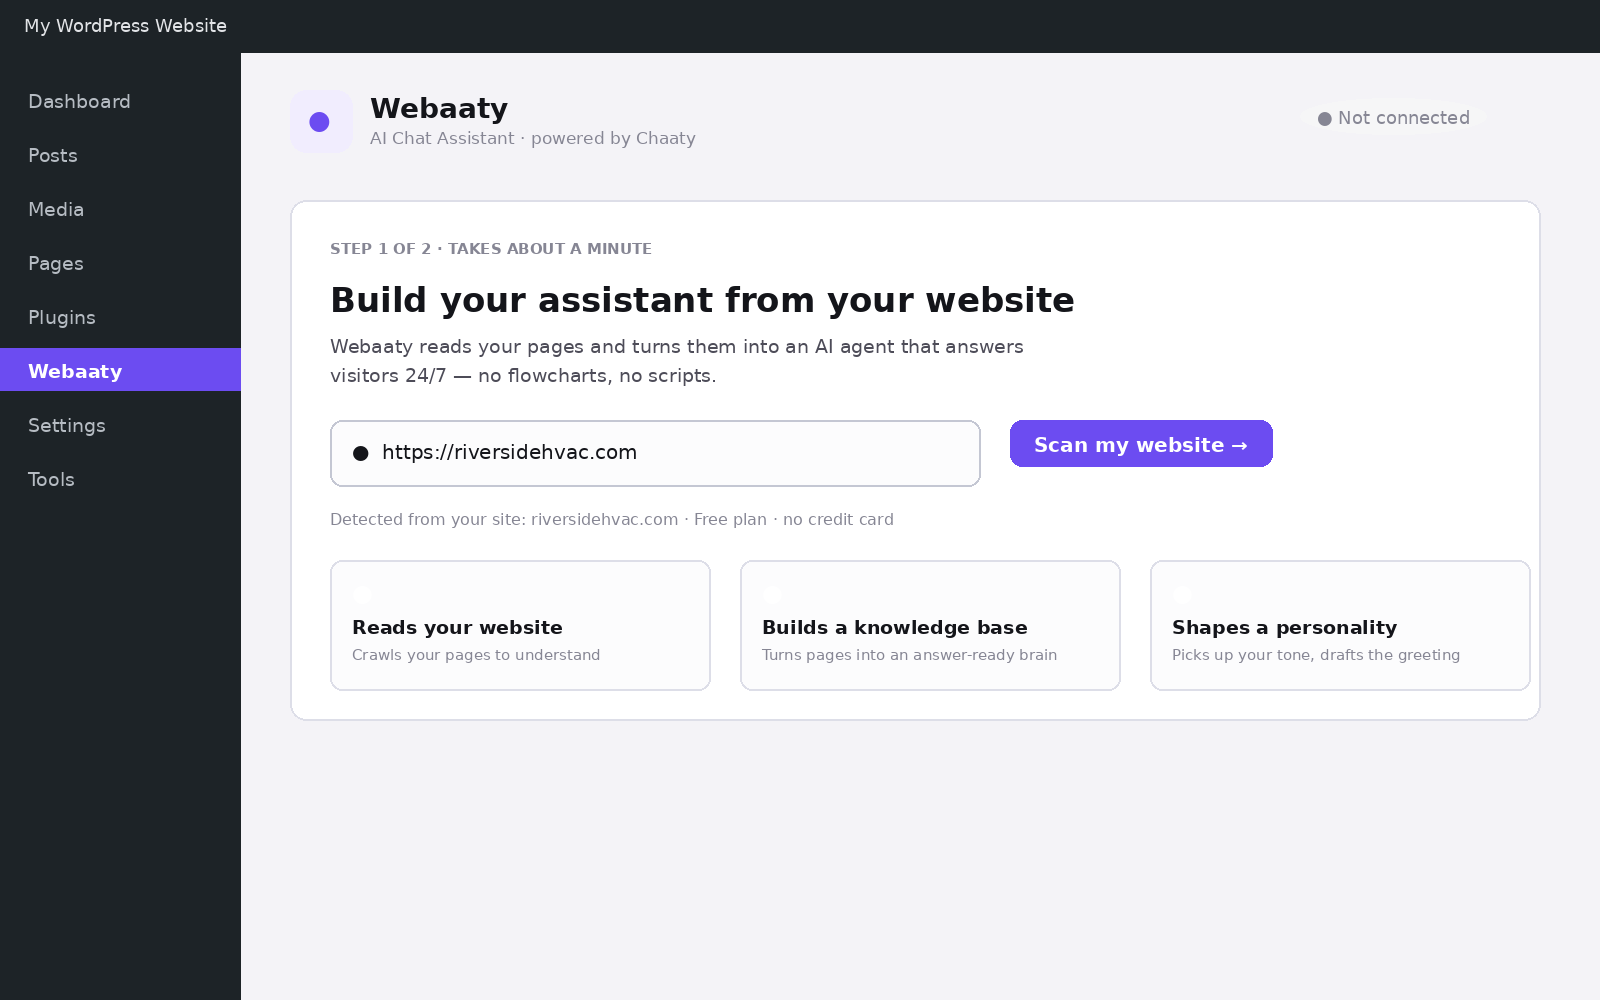
Preview before it goes live
The next screen is your actual assistant, trained on your content — not a canned demo. Ask it real customer questions and check the answers.
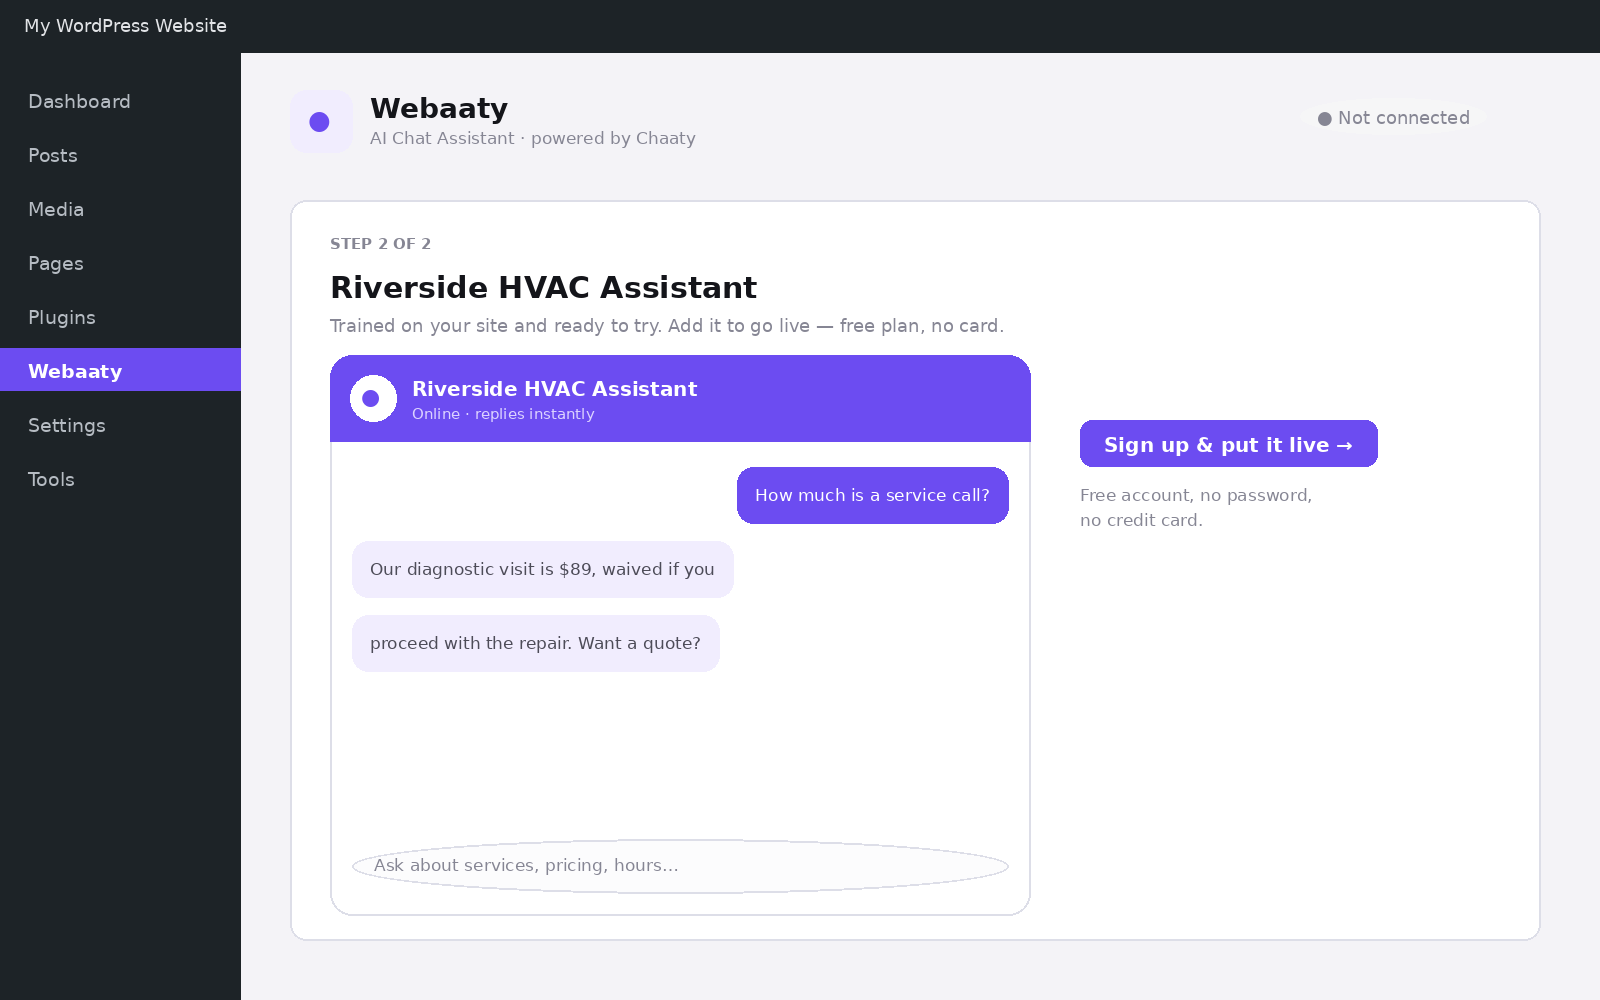
Go live
Click Sign up & put it live and enter your name and email — no password, no card. The widget appears on your site immediately.
The Overview screen
Once connected, Webaaty shows an overview: conversations, leads captured, sources trained, this month's usage against your plan, and a Show on site toggle for pausing the widget without uninstalling anything.
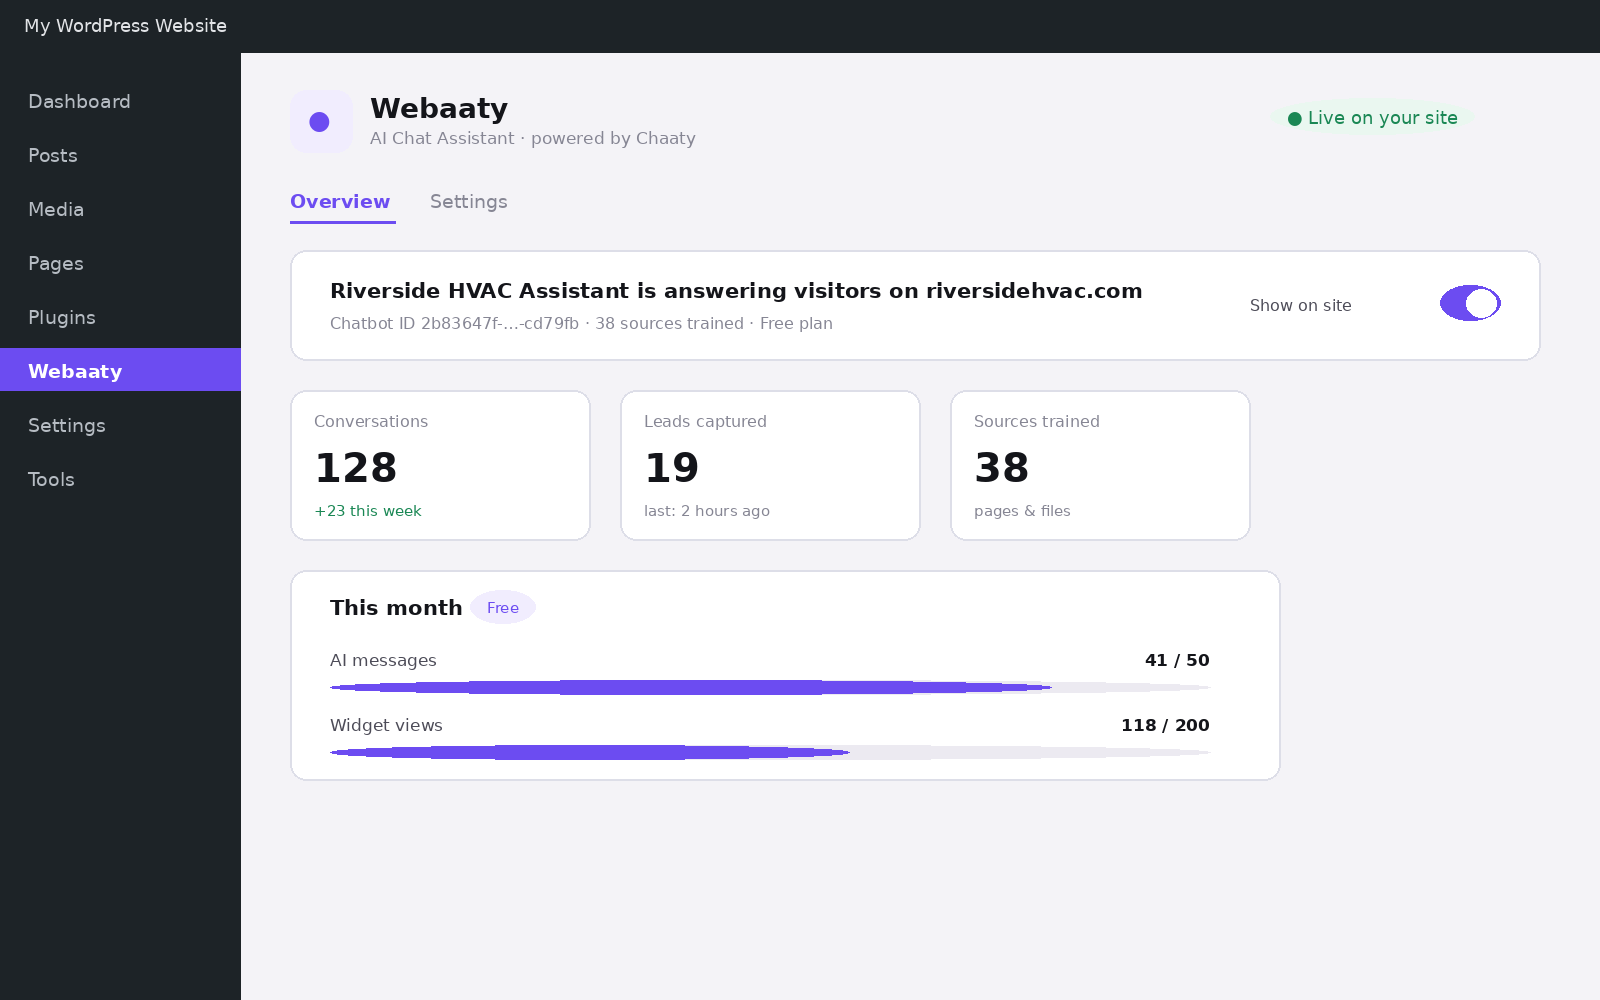
The Settings tab edits the assistant itself — name, greeting, suggested questions, appearance — plus WordPress-only options like hiding the widget on specific pages.
If something doesn't connect
The setup screen tells you exactly what it's waiting for. For anything visual — widget installed but not appearing — the troubleshooting checklist covers the usual suspects in order.
Put an AI assistant on your site today
Chaaty reads your website and builds a working assistant in about a minute. Free plan, no credit card.